Track and Field Equipment: What You Really Need for Each Event
Ever noticed how much stuff is loaded onto a track when the athletes roll in? It’s not just for looks—each piece of equipment, from shoes to pole vault bars, plays a big role in getting those records broken. Understanding what equipment you actually need for each track and field event can save you money, boost your times, and help you avoid embarrassing fails (like trying to sprint in the wrong shoes).
If you’re a beginner, let’s clear up the basics first. For running events, you’ll need spike shoes that can grip the track, starting blocks to give you a solid push-off, and if you’re into relays, you can’t skip the baton. Sounds simple, right? But choosing the right shoes depends on the event distance, and even the baton’s weight and size can affect your pass in a real race. We’ll break all this down, so you skip the guesswork and actually enjoy your time on the track.
- Running Gear: Shoes, Blocks, and Batons
- Jumping Essentials: Poles, Pits, and Measuring Tools
- Throwing Event Equipment: Shots, Javelins, and Discs
- Safety and Marking Tools on the Field
- Care, Maintenance, and Practical Tips
Running Gear: Shoes, Blocks, and Batons
Getting the right gear for running events is way more important than many folks think. It's not just about looking sharp, it's about real results—shaving seconds off your time and lowering your risk of injury.
First up: the proper shoes. These aren’t just any sneakers off the rack. Track spikes are designed for specific distances. Sprint spikes boost grip at the front for explosive starts, while distance spikes have a bit more cushion for long races. A 2023 study from the National Federation of State High School Associations (NFHS) found that wearing event-specific spikes can reduce finish times by up to 2.1% compared to basic running shoes. That’s a huge jump when you’re racing against the clock.
| Event | Recommended Spike Type | Key Feature |
|---|---|---|
| Sprints (100-400m) | Sprint Spikes | Rigid plate, aggressive pins |
| Middle Distance (800-1500m) | Middle-Distance Spikes | Balanced grip & minimal cushion |
| Distance (1600m+) | Distance Spikes | More flexible, some cushioning |
Next, let’s talk starting blocks. If you’re racing anything up to the 400 meters, these are a must. Blocks help you explode off the line fast. The adjustable pedals fit your foot position, and you’d be surprised how much that affects your launch. World record holders nearly always use custom settings. A good tip: line up the front block about 2 foot-lengths from the line and the back one about 3 foot-lengths—then tweak to comfort.
Now, for relays, the baton gets overlooked but it’s a critical piece. International rules say the baton must be between 28-30cm long and weigh at least 50g. Light enough for speed, but not so light it slips out of sweaty hands. Practice is everything—the handover is where teams win or lose. Even world-class teams have dropped the baton under pressure. Paint or wrap your baton for visibility so it doesn’t get mixed up with another team’s. One overlooked trick: train with slightly heavier batons, then switch to regulation weight for race day. It makes handoffs feel even easier when it matters most.
When it comes down to it, picking your track and field equipment with care is the difference between an average race and a personal best. Every detail counts, right down to the fit of a shoe or the smoothness of a baton exchange.
Jumping Essentials: Poles, Pits, and Measuring Tools
Track and field jumping events need way more than just a good leap. You can’t do pole vault, high jump, or long jump without the right tools. Equipment here doesn’t just keep things fair—it keeps athletes safe and makes sure records mean something.
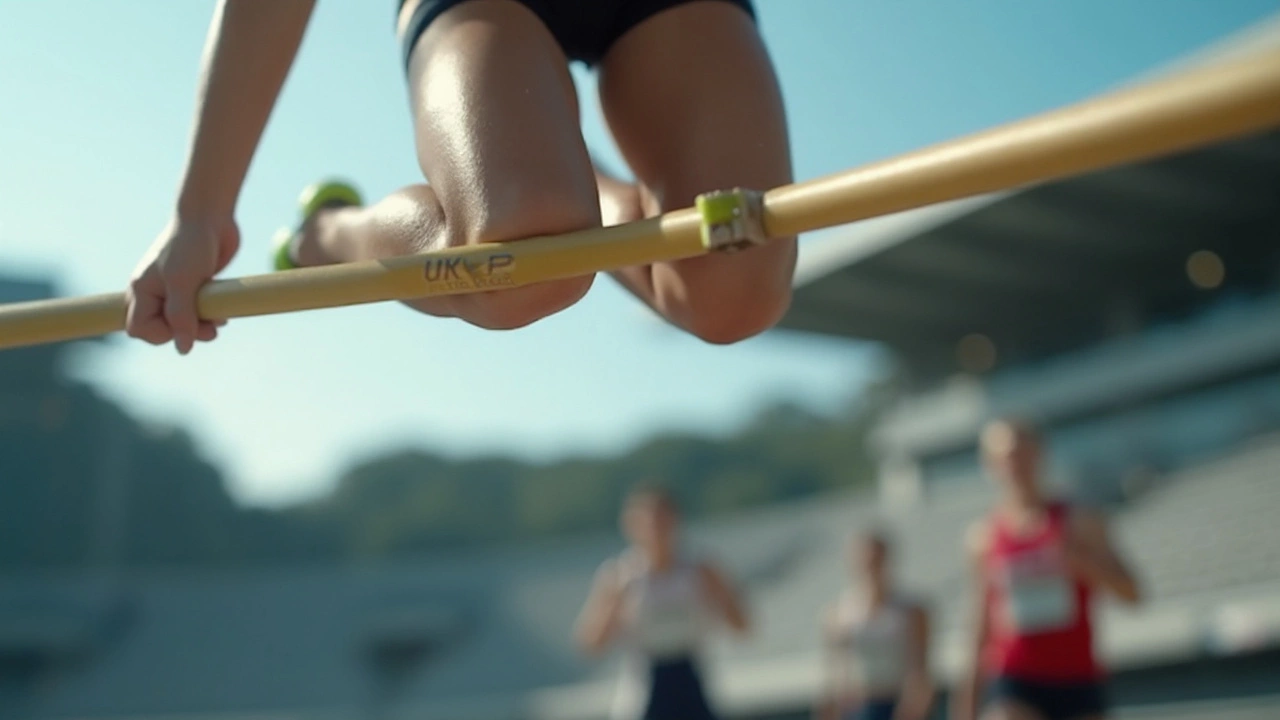
Let’s talk pole vaulting, because nobody’s running around with just any pole. Poles are made from fiberglass or carbon fiber, built to bend just right under an athlete’s weight. They come in different lengths and stiffness levels. A heavier or taller vaulter will need a thicker, longer pole. Fun fact: Some competition poles cost over $500 each, and they can break if used wrong—that happens more often than you’d think, especially with beginners pushing poles past their rating.
Now, the pits. For high jump and pole vault, the landing pit is a giant cushion, usually a foam-filled mat with a cover that lets you slide off without skin burns or twisted ankles. These things aren’t small. The official size for a pole vault pit, according to World Athletics, is at least 6 meters by 6 meters. But not every school actually meets that standard—so double check before you leap.
For the long jump and triple jump, you land in a sand pit, not on a mat. The sand has to be soft and deep enough to break your fall but not so fluffy that you sink and struggle to get out. You want a pit that’s at least 9 meters long so you have plenty of room for both regular jumpers and record-setters. Some places use rakes to reset the sand after each jump so the next athlete gets an even surface.
Next up: measuring tools. Nobody wants their best jump marked short, so every meet uses special tape measures and laser distance systems to get accurate to the centimeter. At big events, you’ll see officials using laser rangefinders to take out any human error. There are also plastic or metal bars for high jump and pole vault heights, and you’ll spot lines or board markers for take-off points so every attempt is scored by the same rules.
Here’s a quick comparison of gear for jumping events:
| Event | Main Equipment | Typical Dimensions | Extra Tools |
|---|---|---|---|
| Pole Vault | Pole, landing pit | Pole: 3-5.5m; Pit: 6x6m | Bar, uprights, tape measurer |
| High Jump | Landing pit, crossbar | Pit: 5x3m; Bar: 4m | Uprights, markers, ruler |
| Long Jump/Triple Jump | Sand pit, takeoff board | Pit: 9x3m; Board: 1.22m long | Rake, marker flags, tape or laser measure |
Bottom line: If you’re gearing up for track and field equipment, make sure your jumping setup matches your event, size, and ability. Don’t skip safety—big pits and accurate measures aren’t just for pros. They’re the reason you get to walk away from each jump and brag about your score.
Throwing Event Equipment: Shots, Javelins, and Discs
Throwing events in track and field aren’t just about brute strength—your gear matters more than most people think. Each event uses a different piece of equipment, and little details, like the type of grip or material, can change your throw by meters. Let’s start with the basics for each event.
- Shot put: The shot is a heavy metal ball. Men usually throw a 7.26kg (16lb) shot, while women’s is 4kg (8.8lb). Most are made of solid iron or brass for outdoor use, but indoor versions may be filled with lead or covered in rubber to protect gym floors.
- Discus: The discus is basically a flat, round disc, usually with a metal rim and a hard plastic or fiberglass side. Male athletes throw a 2kg discus, females get a 1kg one. The grip matters—a discus with too smooth a side is just asking to slip out early. Some even have indented sides for better hold.
- Javelin: This is the long, spear-like thing. Official weight for men is 800g (just under 2 lbs) and 600g for women, and they must meet minimum and maximum length rules. Most javelins are aluminum or carbon fiber these days for better balance and flex. The grip, called the ‘cord grip,’ is vital for control—if it’s worn or slippery, your throw’s a mess.
If you’re new, you really need to check the competition requirements. Each level—high school, college, Olympic—can change the weight and size rules. Here’s a quick look at standard sizes and weights:
| Event | Men's Weight | Women's Weight | Notes |
|---|---|---|---|
| Shot Put | 7.26 kg | 4 kg | Solid metal ball |
| Discus | 2 kg | 1 kg | Metal rim, plastic/fiberglass body |
| Javelin | 800 g | 600 g | Aluminum or carbon fiber |
Some quick tips: always check your implement for cracks or damage before competing, and wipe them off if surfaces get wet. A slippery shot or disc is the fastest way to foul your throw. If your event allows, try a few different brands—yes, that can make a difference. Some javelins are built for bend and flex, helping advanced throwers but hurting beginners who can’t control the technique yet.
One odd fact—at big meets, every javelin must be inspected for proper flex and balance, and some get rejected right before throws. So don’t buy weird off-brand gear online for cheap; stick with tried-and-tested brands used at local tournaments.
If you’re serious about track and field equipment for throws, investing in reliable gear (and actually practicing with it) pays off way more than flashy shoes or shorts.
Safety and Marking Tools on the Field
You don't want anyone wiping out or running into the wrong lane, so safety gear and clear markings are a must on any track and field setup. It’s not just for show: using the right barriers, cones, and markers keeps meets running smooth and athletes safe.
The most common safety barrier is the padded pole vault pit. The padding here is at least 80 centimeters thick, because a thin mat just won’t cut it if someone drops from 15 feet. High jump mats are just as important—both not only cushion falls but also reduce injuries like sprained ankles or, worse, head bumps.
Lining the field with cones and flags is a basic move, but it matters more than most think. Did you know that the IAAF (now World Athletics) regulations say all lanes should be marked with lines about 50 millimeters wide? These markings help sprinters stay in their lane and judges spot lane violations instantly. Sometimes you’ll see collapsible hurdles; these are made to fall apart if hit, so nobody gets seriously banged up from a bad step.
For the throwing events, cages are not just a suggestion—they’re the rule. A discus or hammer toss gone wrong could really hurt someone. That’s why throws are almost always done from a circle that’s inside a safety cage. Spotters are used at big meets too, to keep an eye out for wild throws.
Here's a quick breakdown of safety and marking gear and what they protect against:
| Equipment | Purpose | Common Injury Prevented |
|---|---|---|
| Pole Vault/High Jump Mats | Cushion falls | Head and spinal injuries |
| Throwing Cages | Shield bystanders | Accidental impacts |
| Track Markings & Cones | Lane discipline, hazard warning | Collisions and lane infractions |
| Collapsible Hurdles | Limit obstacle injuries | Shin and knee hits |
| Flags/Markers | Show foul lines and marks | Confusion during jumps/throws |
Pro tip: Paint used for marking tracks is designed to handle weather and not get slippery. If you see cheap or faded markings, ask officials to check them. According to athletic director Mike Davies, "Good field markings and up-to-date padding aren’t just legal requirements—they’re how we avoid both minor and major accidents.”
Whether you’re setting up a meet or practicing, double-check that all the key track and field equipment is in place and working. It saves injuries, saves arguments, and just makes things run better for everyone.
Care, Maintenance, and Practical Tips
Good gear lasts longer when you treat it right. You don’t need a lab coat—just a few habits and some attention to detail. For starters, track spikes wear quickly, especially if you walk on concrete with them, so keep them for the track only. After each use, knock out any stones and let them dry if they’re sweaty. If the spikes get dull, twist them out and pop in new ones: most brands sell cheap replacement spikes that take less than a minute to switch in.
Let’s talk about throwing gear, like javelins and discuses. Dents, chips, and bent points sideline them fast. Always check for cracks or nicks before and after use. If you’re in charge of team equipment, keep a quick checklist to spot damage early—nobody wants to get disqualified for an unsafe implement. During storage, keep metal gear dry and wipe it down after a wet day—rust is the enemy and pops up fast, especially on shot puts and hammer wires.
Pole vault poles and high jump bars also need regular checks. Never store them leaning against a wall long-term—they’ll warp. Lay them flat, and don’t leave them baking in the sun or out in the cold overnight. Most pro squads do a monthly inspection for any splinters or cracks (and those cracks can mean a snapped pole, which nobody wants mid-jump).
- Bag all your track and field equipment after use to keep dirt and moisture off.
- Clean batons, measuring tapes, and hurdles with a damp cloth after muddy practices or stormy meets.
- For track shoes, take the insoles out and let them air-dry. Never toss them over a radiator—they’ll get stiff and even shrink.
- Throwing implements (discus, shot put, javelin) should always be checked for tightness of any removable parts.
Here’s a cheat sheet for basic gear lifespan. Of course, it all depends on use and care:
| Equipment | Typical Lifespan (with Good Care) | Replacement Tip |
|---|---|---|
| Track Spikes | 1-2 seasons | Replace when grip is gone or upper is torn |
| Starting Blocks | 3-5 seasons | Check bolts monthly for tightness |
| Javelin | 3-7 seasons | Replace if bent or tip is dull beyond repair |
| Pole Vault Pole | 5-10 years | Replace at first sign of cracks |
| Baton | 5+ years | If dented, replace to avoid drops |
One more thing: mark your personal gear with your name or tape color if you don’t want it “borrowed” at a meet. Lost batons are the most common headache for rookie relay teams. Keep a checklist and check your bag before leaving the track—it only takes a minute but saves you the hassle of scrambling next time you race.